Selecting the right flooring is the most critical decision in any Australian home renovation involving climate control. When integrating Smart Heating & Tiles: The Best Materials for Hydronic Underfloor Systems, you aren’t just choosing an aesthetic; you are choosing a thermal conductor.
Hydronic systems rely on the circulation of heated water through pipes embedded in the floor. For this system to perform at peak efficiency, the surface material must possess high thermal conductivity and low thermal resistance. Tiles, particularly stone and porcelain, are widely regarded as the gold standard for this application.
In this guide, we explore the technical synergy between smart hydronic technology and various tile materials to help you maximize comfort and minimize energy costs.
See more: The Surprising Versatility of Subway Tiles in Modern Interiors
Understanding Hydronic Underfloor Heating Systems
Hydronic underfloor heating is a method of radiant heat transfer. Unlike traditional split systems that heat air (convection), hydronic systems heat the objects and people in a room directly.
How Hydronic Systems Work
The system consists of a boiler or heat pump that warms water, which is then circulated through PEX piping installed beneath the floor. This creates a large, low-temperature radiator under your feet.
The Role of Smart Controls
Smart thermostats allow for “zoning,” where different rooms are heated to specific temperatures at scheduled times. Because tiles hold heat longer than carpet or timber, smart sensors can predict “thermal lag” and turn the system off before the room reaches the target temperature, saving significant energy.
Why Tiles are the Superior Choice for Hydronic Heating
When evaluating Smart Heating & Tiles: The Best Materials for Hydronic Underfloor Systems, we must look at the R-value (thermal resistance). Tiles have a very low R-value, meaning heat moves through them quickly and efficiently.
Superior Thermal Conductivity
Tiles act as a thermal mass. They absorb the heat from the hydronic pipes and distribute it evenly across the floor surface. This prevents “hot spots” and ensures the entire room feels consistently warm.
Durability and Heat Resistance
Unlike timber, which can warp or shrink when exposed to fluctuating temperatures, tiles are inert. They do not expand or contract significantly, making them a safe, long-term investment for heated floors.
Hygiene and Maintenance
Radiant heat reduces dust circulation (unlike forced-air systems). When paired with easy-to-clean tiles, this creates a much healthier environment for Australians suffering from allergies or asthma.
Best Tile Materials for Hydronic Underfloor Systems
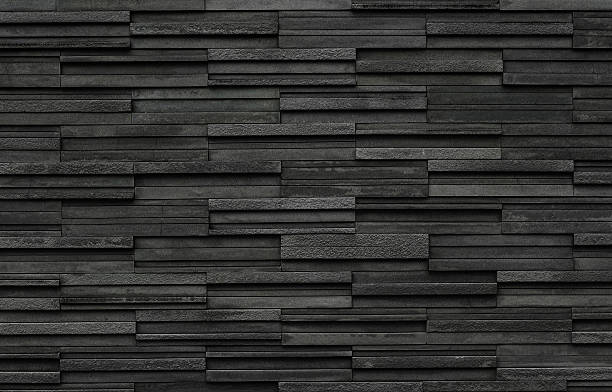
Not all tiles are created equal. Depending on your budget and design preference, different materials offer varying levels of thermal performance.
| Tile Material | Thermal Conductivity | Retention | Best Suited For |
| Porcelain | Excellent | High | Bathrooms & Kitchens |
| Ceramic | Good | Moderate | Bedrooms & Living Areas |
| Natural Stone | Superior | Very High | Open-plan Living |
| Terrazzo | High | High | Modern Architectural Homes |
1. Porcelain Tiles
Porcelain is denser than ceramic, making it an incredible conductor. It is non-porous and highly resistant to stains, making it the most popular choice for Australian smart homes.
2. Natural Stone (Marble, Travertine, Limestone)
Natural stone has the best thermal mass. While it takes slightly longer to heat up than porcelain, it stays warm for hours after the system has been turned off.
3. Ceramic Tiles
A more cost-effective option, ceramic tiles work well with hydronic systems but are slightly more porous than porcelain. Ensure they are laid with high-quality flexible adhesive.
The Installation Process: A Strategic Framework
For a hydronic system to be effective, the installation must follow a rigorous technical process to ensure “crawlativity” of heat.
- Subfloor Preparation: Ensure the concrete slab is level and insulated from below to prevent downward heat loss.
- Pipe Layout: PEX pipes are laid in a serpentine or spiral pattern, usually spaced 150mm to 200mm apart.
- Screed Application: A specialized sand and cement screed is poured over the pipes. This screed acts as the primary heat transfer medium.
- Adhesive Selection: Use a S1 or S2 grade flexible tile adhesive. This allows for the minute movements caused by thermal expansion.
- Grouting: Use a high-quality, flexible grout to prevent cracking as the floor warms and cools.
Maximizing Efficiency with Smart Heating Technology
The “Smart” aspect of Smart Heating & Tiles: The Best Materials for Hydronic Underfloor Systems refers to the integration of AI-driven thermostats and weather compensation sensors.
- Geofencing: Your heating turns on when you are 5km from home, ensuring the tiles are warm the moment you walk in.
- Weather Compensation: The system adjusts the water temperature based on the outdoor Australian climate. If a sudden cold snap hits, the system reacts before your house cools down.
- Adaptive Start: The controller learns how long your specific tiles take to heat up and adjusts the start time accordingly.
Common Mistakes to Avoid
- Using Thick Rugs: Placing heavy rugs over heated tiles acts as an insulator, “trapping” the heat and reducing the system’s efficiency.
- Inadequate Insulation: Failing to install edge insulation or under-slab insulation can result in up to 20% heat loss.
- Fast Initial Heating: Turning the system to maximum immediately after tiling can “shock” the adhesive. Gradually increase the temperature over 7 days.
FAQ: Smart Heating and Tiles
What is the best tile thickness for underfloor heating?
Ideally, tiles should be between 8mm and 12mm thick. Thicker stone (up to 20mm) works well but will have a longer heat-up time.
Does hydronic heating work under outdoor tiles?
Yes, hydronic systems can be used for “snow melting” or comfort heating on alfresco decks and around pools, provided the area is well-insulated.
Can I retro-fit hydronic heating under existing tiles?
Generally, no. Hydronic pipes require a screed bed. Retrofitting usually involves removing the old tiles and heightening the floor level.
How long do tiles take to warm up?
Depending on the thermal mass, porcelain tiles usually reach the desired temperature in 30–60 minutes, while thick natural stone may take 1–2 hours.
Is hydronic heating expensive to run in Australia?
While the initial installation cost is higher than electric systems, the running costs are significantly lower, especially when paired with a modern heat pump.
Internal & External Resource Suggestions
Internal Linking Opportunities (Anchor Text Only):
- Energy-efficient home heating solutions Australia
- Comparing hydronic vs electric underfloor heating
- Maintenance tips for natural stone flooring
- How smart thermostats save on electricity bills
Authoritative External References:
- The Australian Environmental Agency (Energy Efficiency Standards)
- The Australian Tile Council (Best Practices for Tiling over Heated Substrates)
Conclusion: Investing in Long-Term Comfort
Choosing Smart Heating & Tiles: The Best Materials for Hydronic Underfloor Systems is a decision that pays dividends in both comfort and property value. By selecting high-density materials like porcelain or natural stone and pairing them with an intelligently controlled hydronic system, you create a sustainable, high-performance heating solution tailored for the Australian lifestyle.